Checkout Pages
How does it work?
When you use a custom checkout page, you essentially bypass your platform's default checkout pages and replace them with
CheckoutJoy's checkouts. The checkout pages are hosted by us, and you also have the option to connect a custom domain
so that your pages are on your domain - e.g. https://checkout.yourdomain.com.
If you're using funnels or landing pages on other platforms, then your CTA buttons (e.g. your Buy now buttons)
needs to be updated to point to your new CheckoutJoy checkout pages.
Once checkout is complete, the customer is taken to a thank-you page that you configure, so they are back on your website.
Settings
To access the setting page to configure your checkout page, navigate to the Settings tab on the left of the page builder.
Multiple Currencies
You can enable multiple currencies at checkout to give the customer a choice of currency to pay in.
There are limitations to the currencies available depending on the payment processors that you use. Some processors only support some or even one payment currency, so be sure to check the supported currencies of your payment processor before activating a currency.
To activate country restrictions in your checkout page, navigate to the Checkout Settings page and look for the Currencies sections.
Country Restrictions
It is possible to only allow customers from certain countries to access your checkout page. This is useful in situations where you offer different products or prices to different countries or regions. You could, for example, set up a page for your European customers priced in Euro, and one for the rest of the world set in USD.
To activate country restrictions in your checkout page, navigate to the Checkout Settings page and look for the Country Restrictions section.
Select the countries that you want to allow, and set the Fallback URL where customers from countries that are not in the allowed countries list.
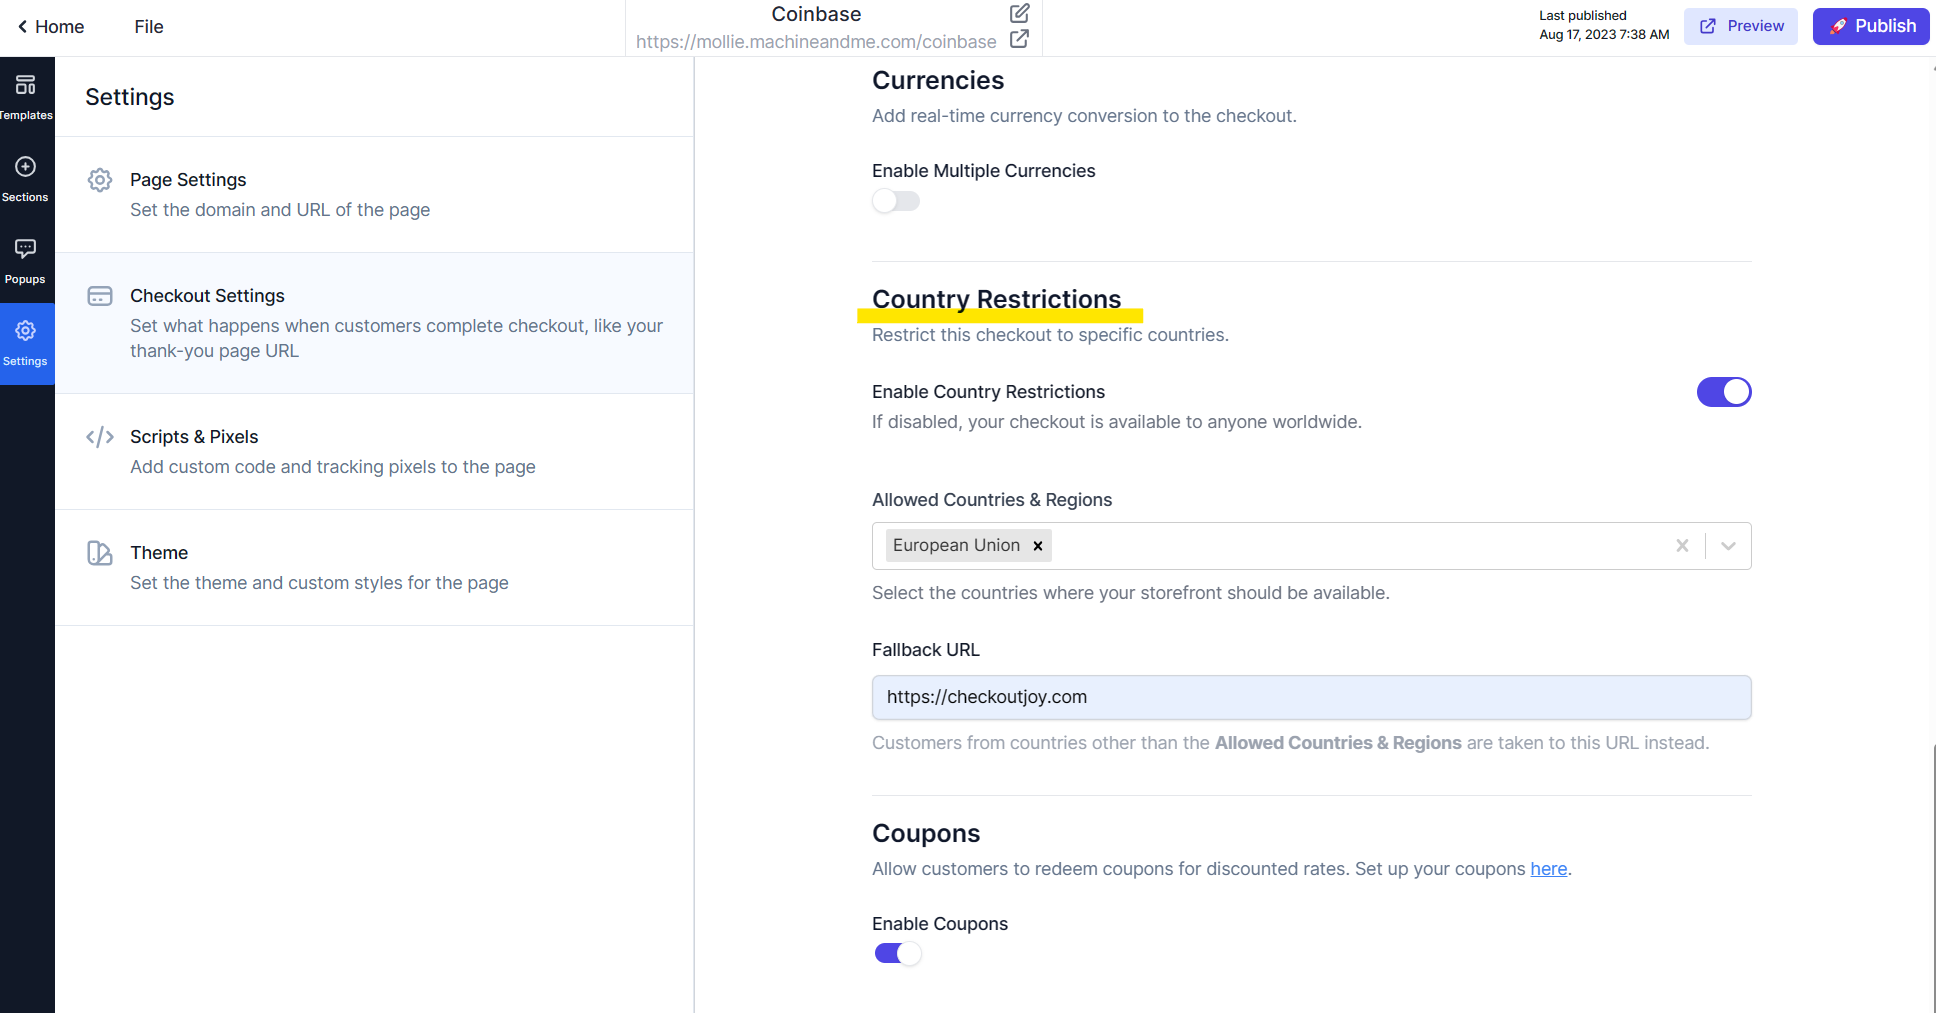
You have to specify a Fallback URL if you enable country restrictions.
Adding custom scripts and pixel code
If you need to add any custom code to a checkout page - example Google Analytics, Facebook pixels or the Facebook Domain Verification tag,
you can do so at Settings > Scripts & Pixels in the Page Builder.
Success Redirect URL
You have the option to take a customer back to your website when a checkout has successfully completed. This is usually referred to as a Thank-you page, but it can be any webpage where you want the customer to go after buying a product.
The Success Redirect URL can be set either on Product level, or on Checkout Page level, with the latter
being used first if it's been set up. CheckoutJoy also appends the transaction details to the URL as query parameters
so that you can use analytics on your thank-you page.
The following parameters are appended to the URL:
| Parameter | Description |
|---|---|
| purchaseId | The CheckoutJoy Purchase ID. This is the same an Order ID in other systems |
| productId | The unique CheckoutJoy product ID |
| productName | Human readable Product Name |
| customerEmail | Customer Email |
| customerName | Full name of the customer |
| currency | Transaction currency |
| total | Transaction total |
You can get the values from the URL using the URLSearchParams class like:
<script>
const urlParams = new URLSearchParams(window.location.search);
const total = urlParams.get('total');
</script>