ConvertKit
The ConvertKit integration allows you to subscribe customers to your Forms in ConvertKit and optionally tag them with specific tags.
This is useful for adding customers to mailing lists and to trigger automations set up in ConvertKit. Using tags in ConvertKit, you can set up powerful automations when a customer is given a tag.
| Feature | Description |
|---|---|
| Subscribe a customer to a Form | Subscribe/unsubscribe a subscriber from a Form in your ConvertKit account when an event occurs e.g. after checkout or when a subscription is cancelled. |
| Tag a Customer | Add certain tags to the subscriber in Convertkit. |
Prerequisites
The ConvertKit integration is available with all CheckoutJoy's plans and all our supported payment processors.
You need an active ConvertKit account to have access to their API.
Connecting your Account
To connect your ConvertKit account with CheckoutJoy you need to add your API details found in your ConvertKit account.
To activate the integration, go to Settings > Integrations in your CheckoutJoy dashboard and select ConvertKit
To get your API details, do the following in your ConvertKit dashboard:
- Select the Settings menu item at the top left
- Select the Advanced option on the left menu
- Your
API KeyandAPI Secretcan be found under the API section of that page.
Now copy the API Key and API Secret values into CheckoutJoy and save.
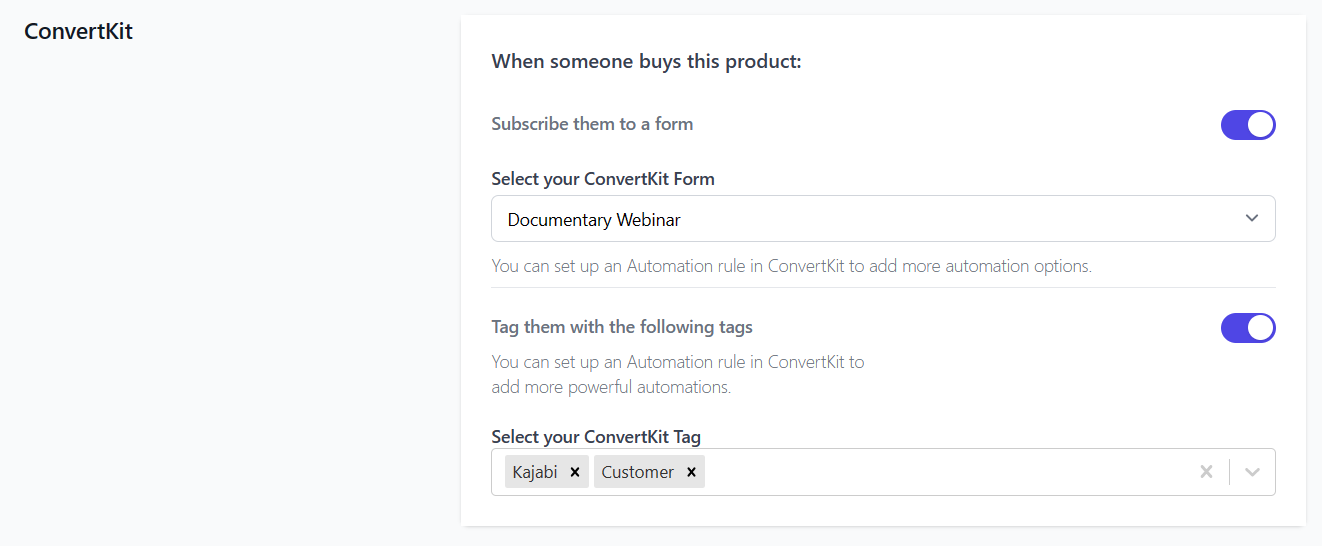
Setting Up
Once the integration is enabled, you will see a new section when you create or update a Product in CheckoutJoy.
Simply enable the toggles of the feature that you want to enable, and select the Form or Tag that you want to add to the subscriber's profile in ConvertKit.