Kartra
Our Kartra integration allows you to sell your Kartra products from our hosted checkout pages, using any of our supported payment gateways and payment options.
- Easy setup and full control over the payment options available to your customers
Automatic management of member access to your Kartra courses and materials
Fully secure checkout experience for your customers
Reporting and notifications on payments received
How does it work
Kartra uses tags to allow powerful automations to be executed on leads and products. CheckoutJoy uses this concept to grant access to memberships and products when a customer completes a purchase through our checkout pages.
In Kartra, your setup will include creating a Tag, and setting up an automation that grants access to a product when a lead is assigned this specific tag.
In CheckoutJoy, you will set up a checkout page which is also linked to the tag that you created in Kartra.
When a customer completes a checkout on your checkout page, CheckoutJoy will create the lead in Kartra (or update if it already exists) and assign the tag to the lead. This will kick-off the Kartra automation to grant the lead access to your membership, and any other automation that is linked to that membership.
And that is it! You have now completed a sale for your Kartra membership using a payment option that your customers know and trust!
Setup Guide
This guide assumes that you already have a product set up in Kartra.
The following steps must be performed in your Kartra account
Step 1 - Create a Tag
In your Kartra dashboard, navigate to My Communications and select Tags from the top navigation.
Enter a unique Tag name and select the appropriate tag category.
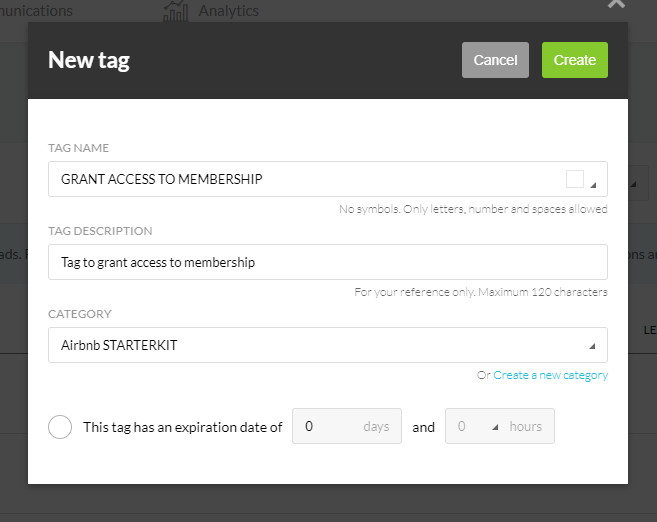
In the next step we'll set up an automation to give access to a product when a Lead is assigned this tag.
Step 2 - Set up an automation
Now set up an automation to grant access to a membership if a lead is assigned that tag. Remember to click the Add before saving.
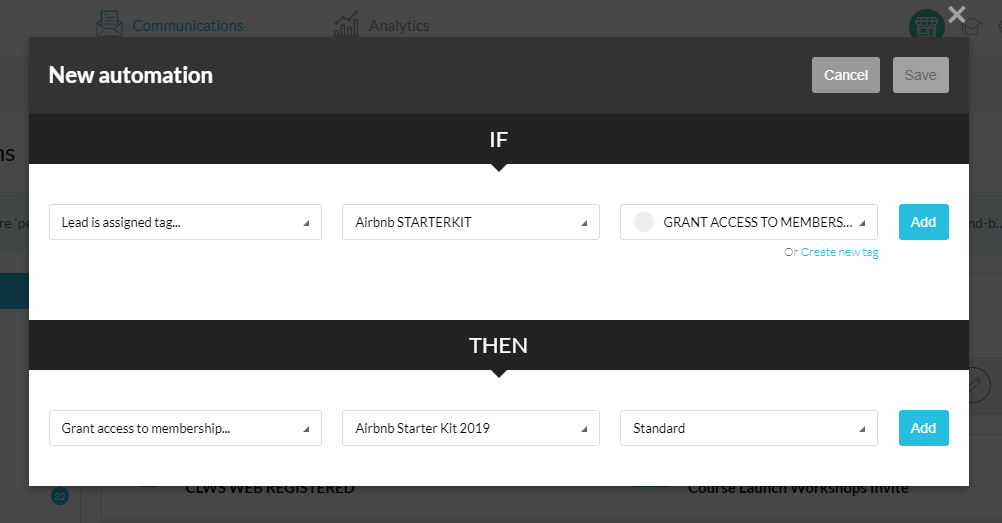
That's it for your Kartra setup! Now move over to CheckoutJoy to set up your checkout page.
Step 3 - Connect your Kartra account in CheckoutJoy
You need to add your Kartra account API Key and API Password to CheckoutJoy to enable the integration.
You can find your API Key and API Password by navigating to My Integrations > API > My API.

Step 4 - Create your Product in CheckoutJoy and link your Kartra product
A Product in CheckoutJoy is used to set pricing and currency information for your Kartra products.
You need an Offer in CheckoutJoy for every product that you want to sell in Kartra.
To create an offer in CheckoutJoy, navigate to Products and select the Create Product option.
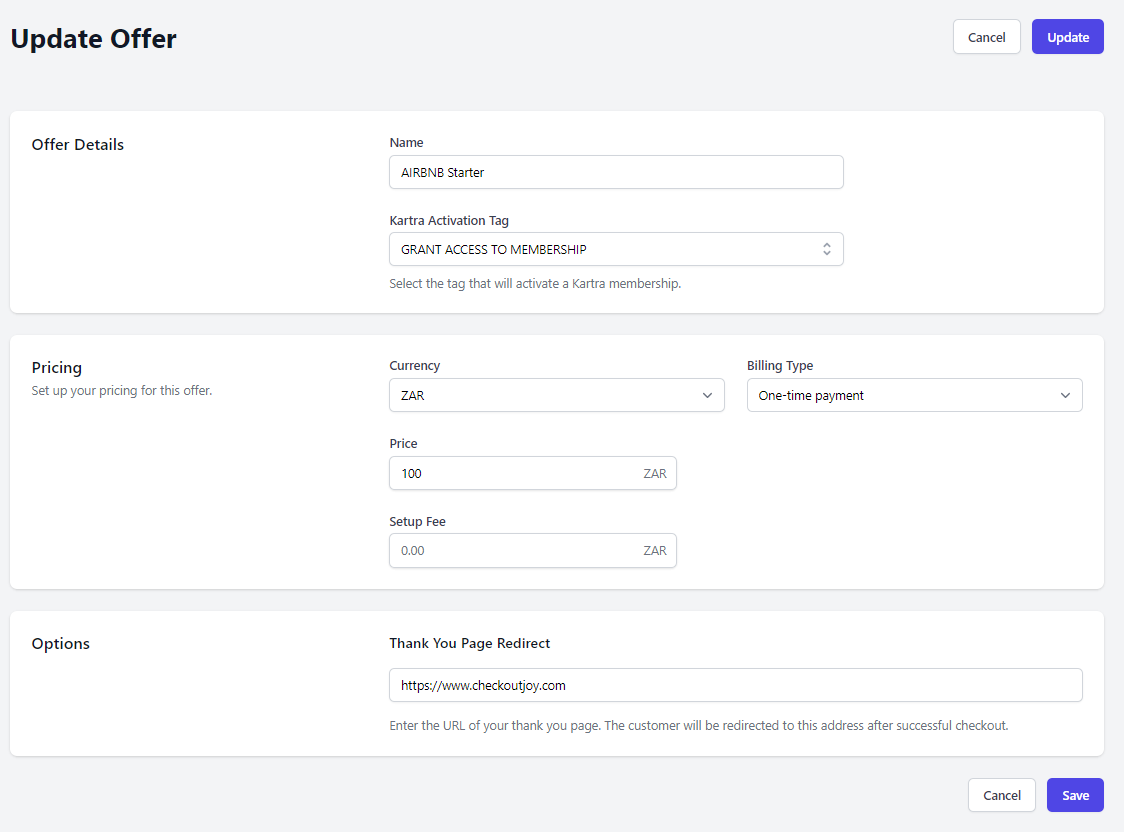
Complete the form to create your offer.
| Setting | Value |
|---|---|
| Name | A unique name to identify your offer, this doesn't have to match the name of the product in Kartra |
| Tag | Select the tag that you configured the automation for in Kartra to activate your product |
| Pricing | Configure your product pricing and currency options |
| Thank you page redirect | Configure the page where customers are taken after completing a purchase |
The following steps must be performed in your CheckoutJoy account
Step 5 - Create a Checkout Page
To sell Kartra products you need to set up a custom checkout page in CheckoutJoy. From your Kartra website your customers are taken to the checkout page (you can customize the domain and URL of the page) for checkout, and after checkout they will be redirected to a thank-you page that you configure.
- Navigate to Pages in your CheckoutJoy dashboard and create a new page using on of the prebuilt templates.
- Once the Page Editor opens, navigate to Settings > Checkout Settings and select the product that you want to sell on the page. The dropdown contains all the products you've configured in CheckoutJoy.
- Go to Sections on the left-hand menu to open the checkout page content editor. Make the required changes to your page content.
- Save and Publish your page to make the changes live.
If you want to edit the URL of the checkout page, go to Settings > Page Settings and change the URL of the page. You can also connect a custom domain to link your pages to a subdomain of your website - e.g. https://checkout.yourdomain.com/ (opens in a new tab).