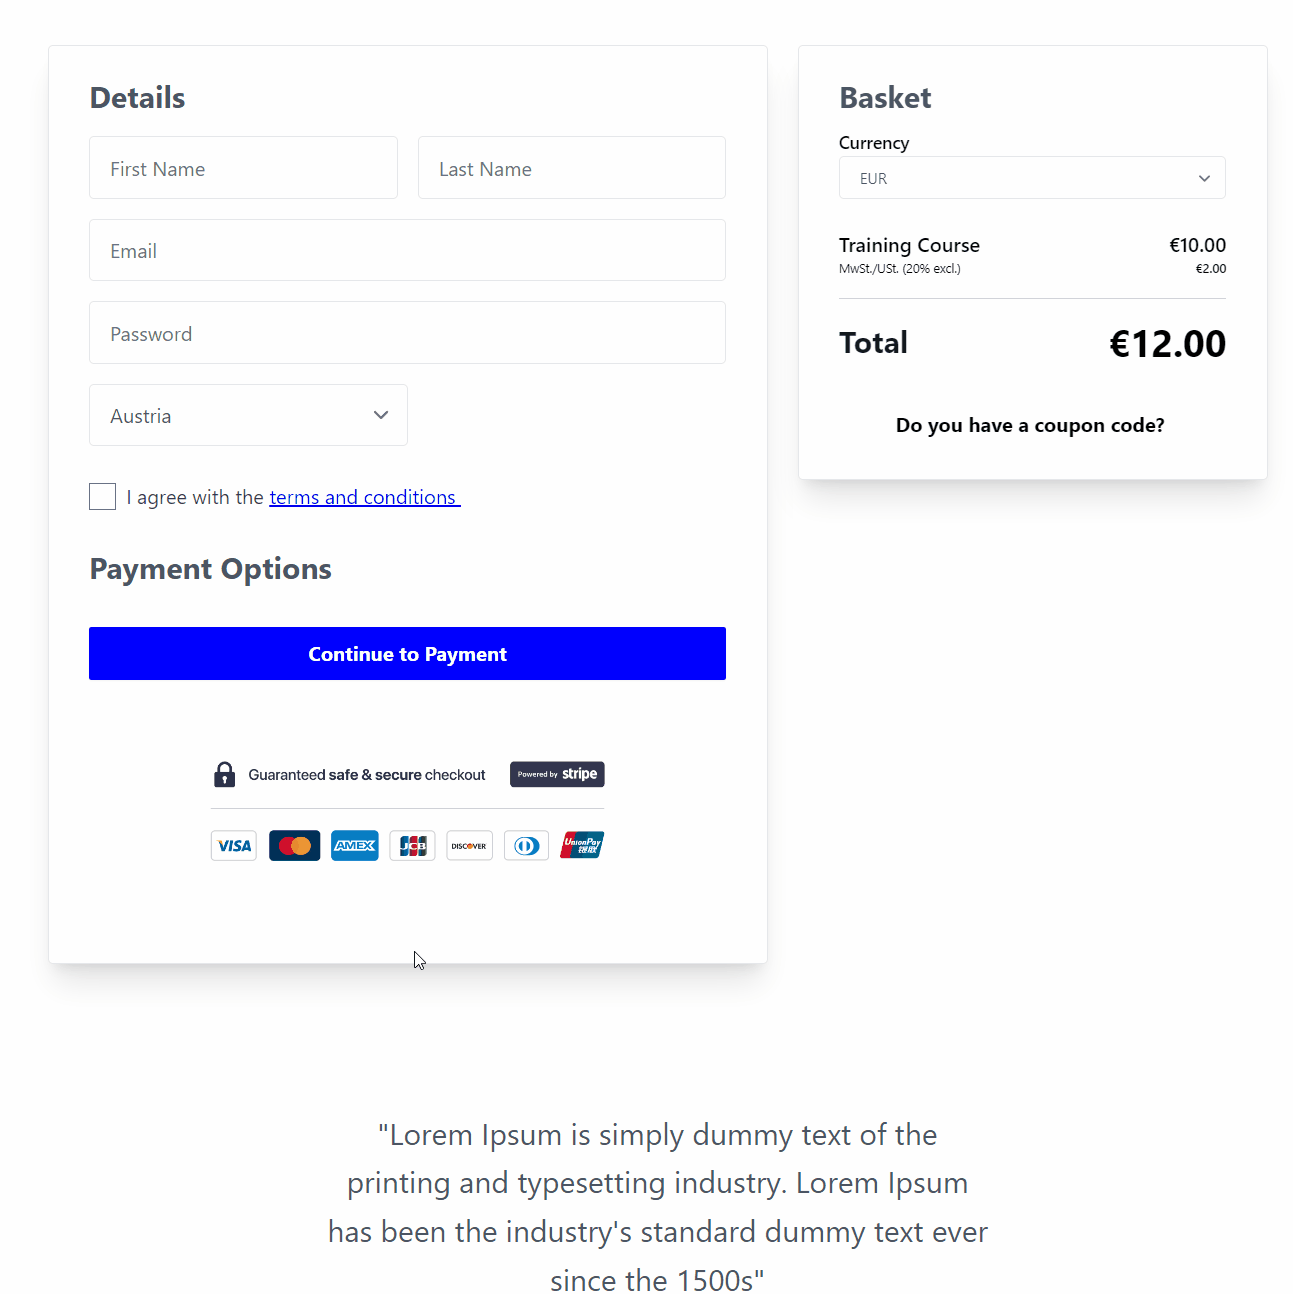
Supported Payment Options
- One-time payments
- Multiple payments
- Subscriptions
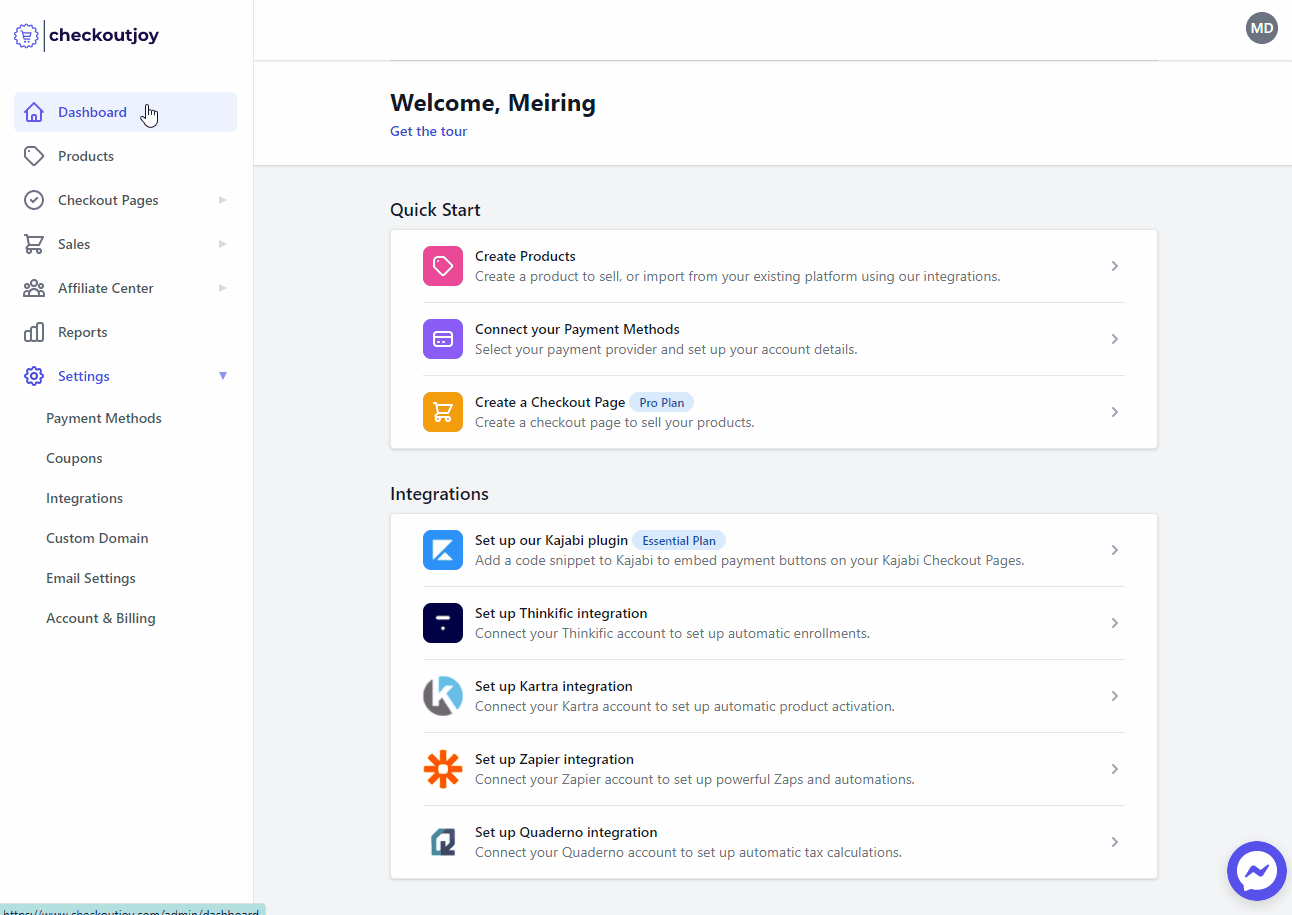
Adding your account details
In the CheckoutJoy dashboard
- Navigate to Settings > Payment Methods
- Select your payment processor and click on Add
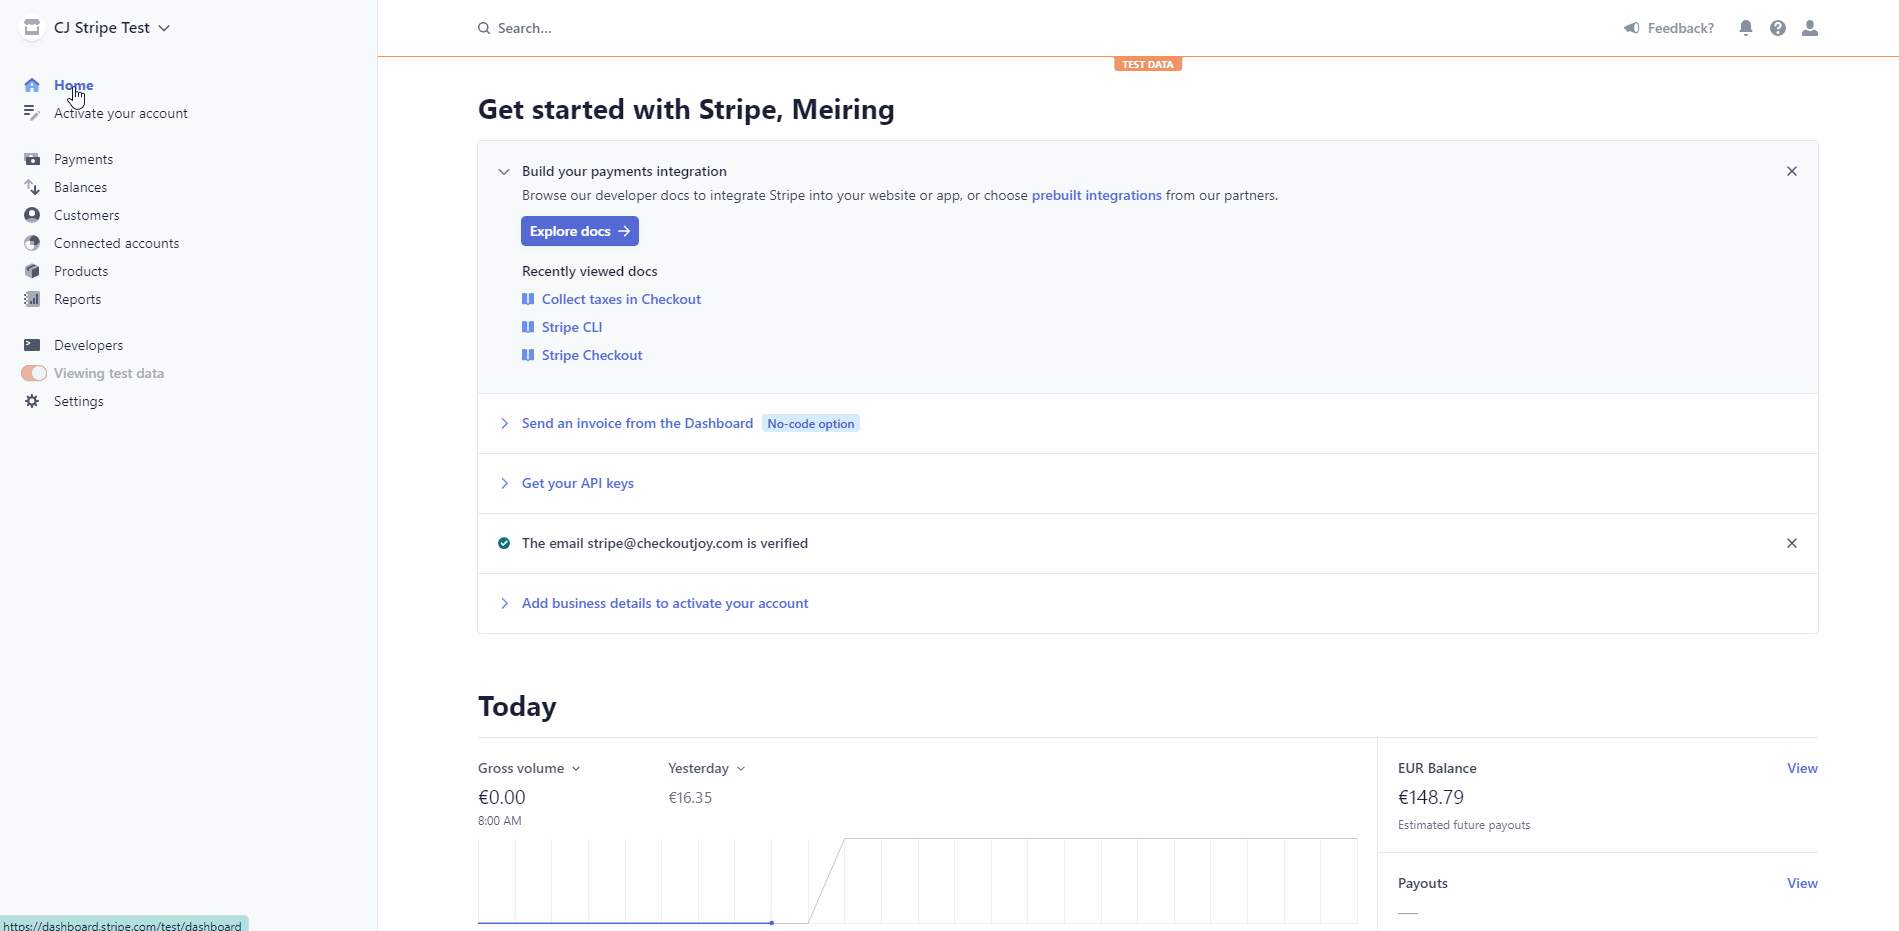
Finding your API credentials
- Log into your Stripe account
- Navigate to Developers > API keys
- Your keys are listed under the Standard Keys
Setting up webhook notifications
CheckoutJoy needs to be notified by Stripe of any payment events that occur when a customer pays using Stripe. These are events such as successful payment authorizations, completed orders, cancelled subscriptions etc. CheckoutJoy needs this information to record revenue and to manage your customer's access to Kajabi offers.
To do this you need to add the CheckoutJoy webhook API address to your Stripe Webhook configuration.
In your Stripe dashboard,
- Navigate to Developers > Webhooks
- Select the Add Endpoint button top right
- Fill in the form with the following details
Endpoint
https://api.checkoutjoy.com/v1/notify?p=StripeEvents
-
setup_intent.succeeded
-
payment_intent.created
-
payment_intent.succeeded
-
charge.refunded
-
customer.subscription.created
-
customer.subscription.deleted
-
customer.subscription.trial_will_end
-
customer.subscription.updated
-
invoice.payment_succeeded
-
invoice.payment_failed
-
invoice.paid
-
invoice.payment_action_required
-
invoice.upcoming
Adding additional Payment Methods to your checkout
Stripe supports a whole bunch of payment methods that you can enable to offer your customers a wider range of payment methods. This gives you the option to add Google Pay or Apple Pay for example, or Klarna and SEPA bank transfers as payment options.
These additional payment options can be activated in your Stripe account.
Apple Pay
Stripe users can accept Apple Pay in iOS applications in iOS 9 and above, and on the web in Safari starting with iOS 10 or macOS Sierra. There are no additional fees to process Apple Pay payments, and the pricing is the same as other card transactions.
There are a few steps that need to be completed to enable the payment option on your CheckoutJoy checkouts:
- Enable Apple Pay in your Stripe Payment Method settings
- Add your custom domain to Stripe's Apple Pay settings
- Understanding when the Apple Pay option is available
Enable Apple Pay in your Stripe Payment Method settings
Visit the Payment Method settings (Settings > Payment Methods) in your Stripe Dashboard and make sure that the * Apple Pay* payment option is enabled.
Add your custom domain to Stripe's Apple Pay settings
Navigate to the (Apple Pay Settings in your Stripe
Dashboard)[https://dashboard.stripe.com/settings/payments/apple_pay (opens in a new tab)] and make sure
that the domain that your checkout pages are hosted on is added to the list of allowed domains. This must be the same
domain
as the Custom Domain that you've added to CheckoutJoy.
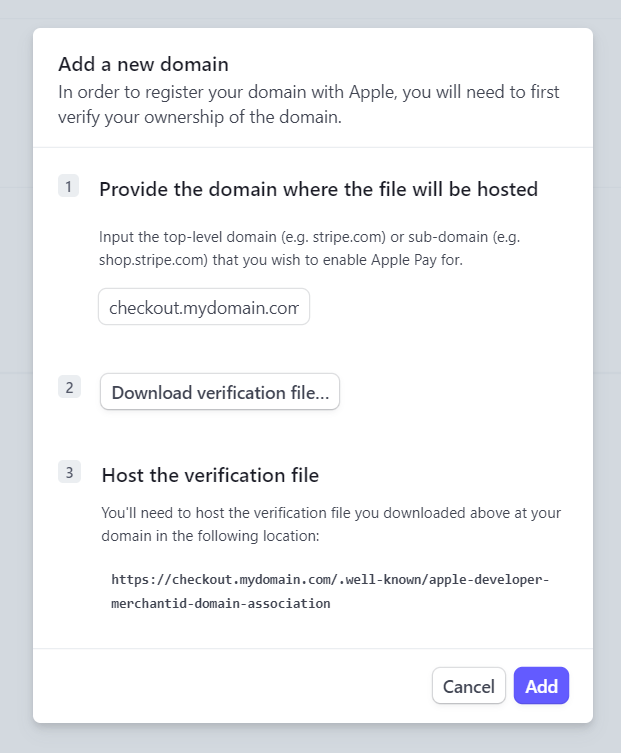
You can safely ignore steps 2 and 3 of the popup - Host the verification file - as CheckoutJoy already hosts the file on your custom domain.
Understanding when the Apple Pay option is available
There are a few things that determine if the Apple Pay payment option is displayed to the customer. This is checked by Stripe when displaying the Stripe payment options on the checkout page.
- The customer's device - The option is only available when the customer is using the Safari browser on a Mac with Touch ID, an iPhone or an Apple Watch
- Their Apple ID - the device must be logged into an active Apple ID with a valid debit/credit card enabled
- The currency of the product
| Device | Requirement |
|---|---|
| Desktop | Safari browser running on a Mac (macOS 11 or newer), and supports Touch ID |
| iPhone | iOS 9 and above |
| iWatch | iOS 9 and above |
Displaying all payment methods on page load
When using Stripe on checkout pages, all the available payment methods that are offered by Stripe are displayed when the page loads.
Incomplete and Abandoned Payments
You might see an increase in Incomplete or Abandoned payments in your Stripe dashboard after enabling multiple payment methods for Stripe on your checkout pages.
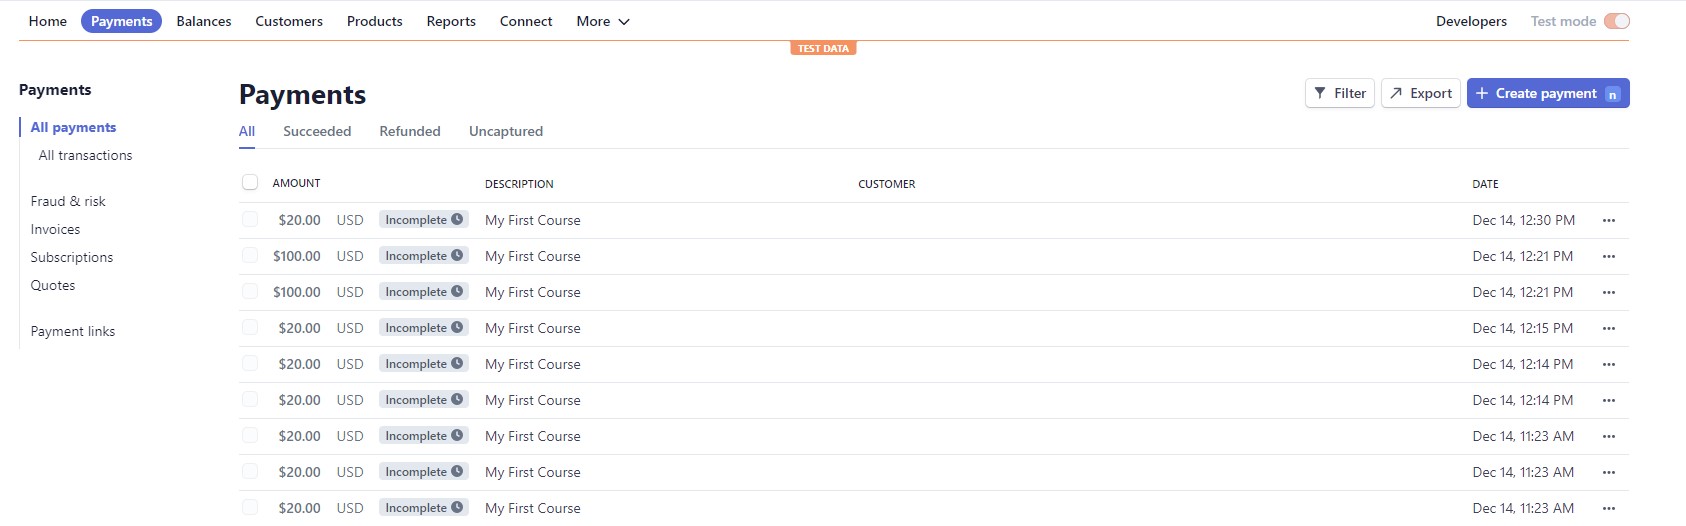
This is because CheckoutJoy needs to create a Payment in Stripe (called a Payment Intent) so that Stripe can load the payment widget (called Stripe Elements) can load the correct payment options for your customer. They need the Payment Intent to determine which of the enabled payment methods in your Stripe account should be displayed to the customer, based on where the customer is from and the currency of the payment.
For example, if you've enabled SEPA Direct Debits as a payment method, it will automatically only display to customers in the EU. Your customer from India will not have that Payment option. Stripe also checks the device type, so Google Pay and Apple Pay is only available on compatible devices. Klarna for example is only available for checkouts in EUR.
The upside of this approach is that all the payment options are shown to the customer, you can have up to 20 different payment options including card, wallets, BNPL, bank transfers which would certainly help to make the sale.
The downside is that it will create confusion in your Stripe dashboard, as cancelled payments are not will not reflect abandoned carts necessarily. If someone just views the checkout page with no intent to purchase there will still be a Payment registered in Stripe because the payment methods are shown to the customer.
By default, a customer has 30 minutes to complete a payment once the checkout page has loaded. After that, CheckoutJoy automatically changes the status of the payment to "abandoned" and cancels the Payment Intent in your Stripe account.
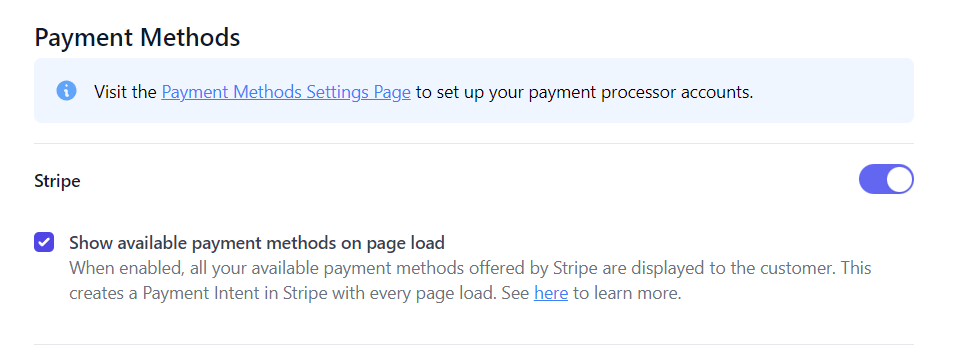
If you don't like the way the new Stripe Elements handles payments in your Stripe account, then we recommend that you disable this feature by delaying the payment initiation or use the Card Only option for Stripe in your checkout sections. Card only payments will only create a payment in your Stripe account once the customer has submitted their card details.
Delaying the Payment Initiation
If you want to Payment Intent when the page loads, you can do this by disabling the
Show available payment methods on page load setting in the page's Checkout Settings. Disabling this setting
will require the customer to click the Proceed to Payment button to initiate the payment. Your Stripe payment
widget will only display after the customer clicks this button.
To enable this checkout flow, do the following steps:
-
Go to Pages in your CheckoutJoy dashboard
-
Create a page or Edit the page where you want to change this setting
-
Go to Settings > Checkout Settings using the left-hand navigation of the Page Builder
-
Scroll to Payment Methods and uncheck the checkbox to display available payment methods when the page loads.
-
Save and Publish your page.
The checkout flow now has a different flow which requires the customer to click the Proceed to Payment button to initiate the payment widget. The result of this is that there will only be a payment created in Stripe for customers that have the intent to purchase the product, but they will not see all the available payment methods when the page loads.