With CheckoutJoy you can create products that are linked directly to a product in your Thinkific account.
When a student completes a purchase, CheckoutJoy will automatically enroll the student to the purchased course or bundle.
Create a Thinkific Product
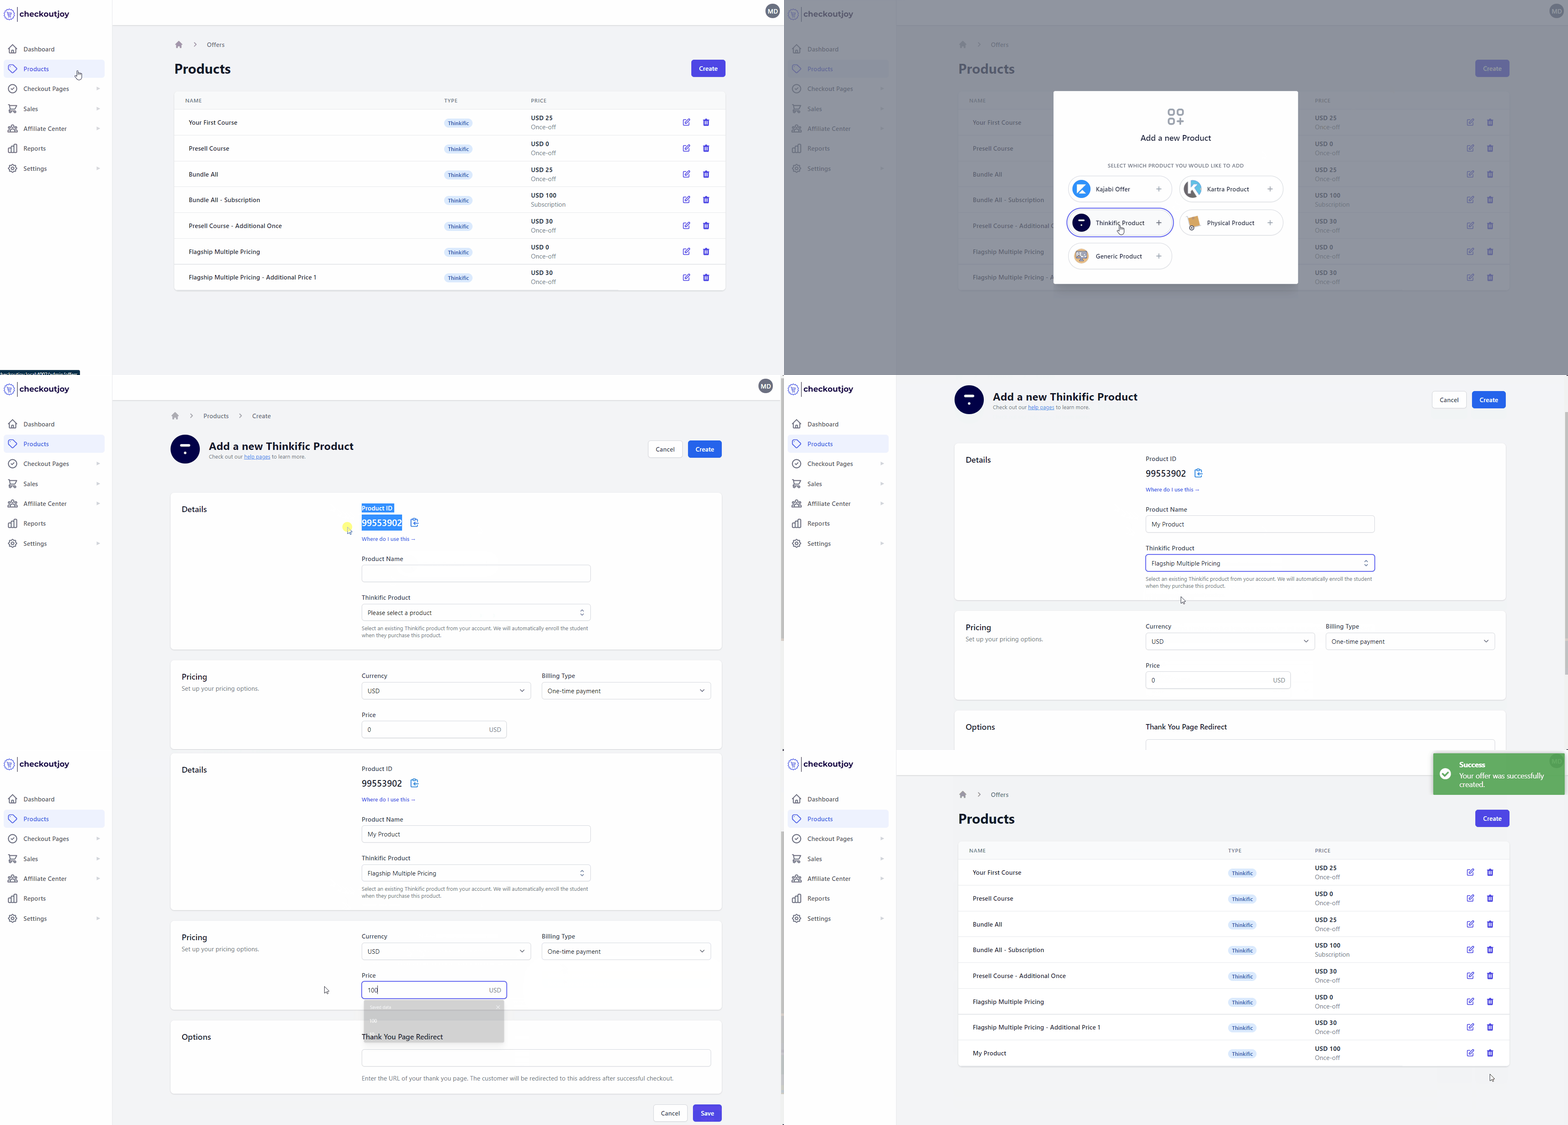
To create a product in CheckoutJoy that is linked to a Thinkific product in your account,
- Go to Products in your CheckoutJoy dashboard
- Click Create and select the Thinkific Product option

- Fill in the product details and select the Thinkific Product to which this product is linked.
- Click Save
Using your Thinkific Product ID
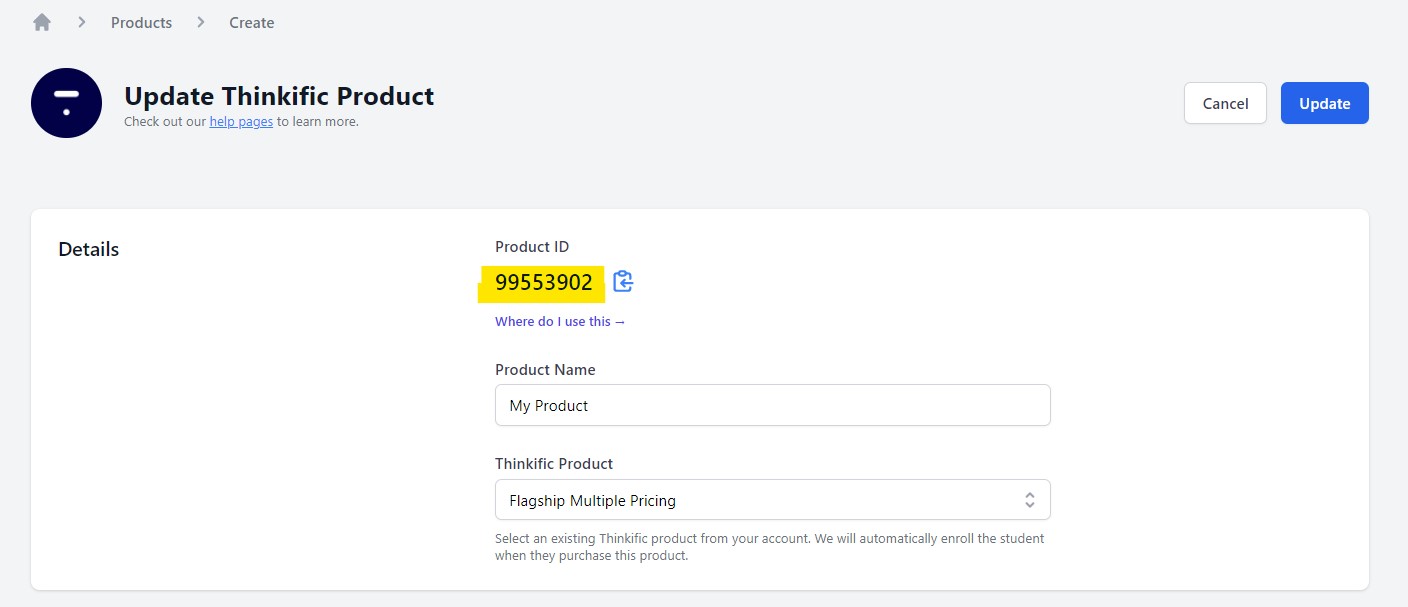
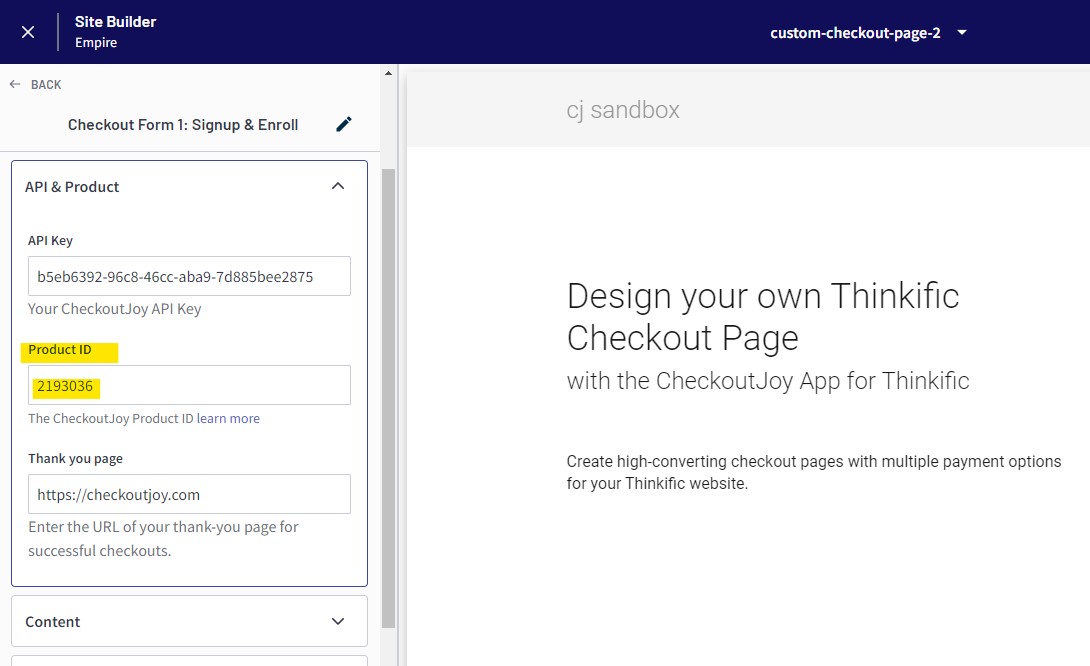
CheckoutJoy assigns a unique ID to every Thinkific product. This is used by the Custom Sections to pull the correct pricing information on checkout.
- From your CheckoutJoy dashboard, edit the product you would like to sell on your Thinkific page.
- Copy the Product ID displayed on screen

- Paste the value into the Product ID setting of the API & Product section

Import your Thinkific products to CheckoutJoy
When you install CheckoutJoy from the Thinkific App Store, all your Thinkific products (courses and bundels) will be automatically imported into your CheckoutJoy account. Products that have multiple pricing options will be imported as separate products in CheckoutJoy.
You can edit the details of an imported product any time by visting Products.
Manually importing
You can also import your Thinkific products from the CheckoutJoy dashboard any time. CheckoutJoy will pull your product details from Thinkific and create/update your records in CheckoutJoy.
Please note that the importer will overwrite any changes that you've made to your Products in CheckoutJoy.
To import your products, go to your Thinkific Settings and select Import.