Facebook Conversion API
This integration automatically sends purchase & checkout events to the Facebook Conversions API (opens in a new tab) using your unique Pixel ID.
Prerequisites
You need to have a valid Pixel already set up in your Facebook Business Manager (opens in a new tab) dashboard.
How does it work?
This integration automatically sends checkout events to the Facebook Conversions API (opens in a new tab) using your Pixel ID.
These events can be seen in your Facebook Events Manager (opens in a new tab) dashboard and used in your paid promotions to track marketing objectives.
For example, if you're running ads for a paid product, you can set up your ad with a marketing objective as a conversion using the Purchase event. The Purchase event includes the product's name and purchase value so you can segment the data based on the name included in the event parameters.
The following events are sent by the integration:
| Event | Description |
|---|---|
| Purchase | Triggered after a customer completes a checkout. The event includes the product names and purchase value of the transaction. |
| AddToCart | When a product is added to a cart (including order bumps), and when a cart is created preloaded with product(s). |
Enabling / Disabling Events
Your events will start triggering as soon as you save your Pixel ID and Access Token in CheckoutJoy Settings (opens in a new tab).
You can enable or disable the sending of the events in your CheckoutJoy dashboard - Facebook Converstion API Settings (opens in a new tab)
Setup
To connect your Facebook account, you need to add your Pixel ID and Access Token to your CheckoutJoy account. Both
these values are found in your Facebook Events Manager (opens in a new tab) dashboard under Data Sources.
Pixel ID
In your Facebook Events Manager (opens in a new tab)
- Go to Data Sources and select the Pixel that you want to connect from the list.
- Go to the Settings tab
- Copy your Pixel ID displayed on the settings page to paste into CheckoutJoy settings page.
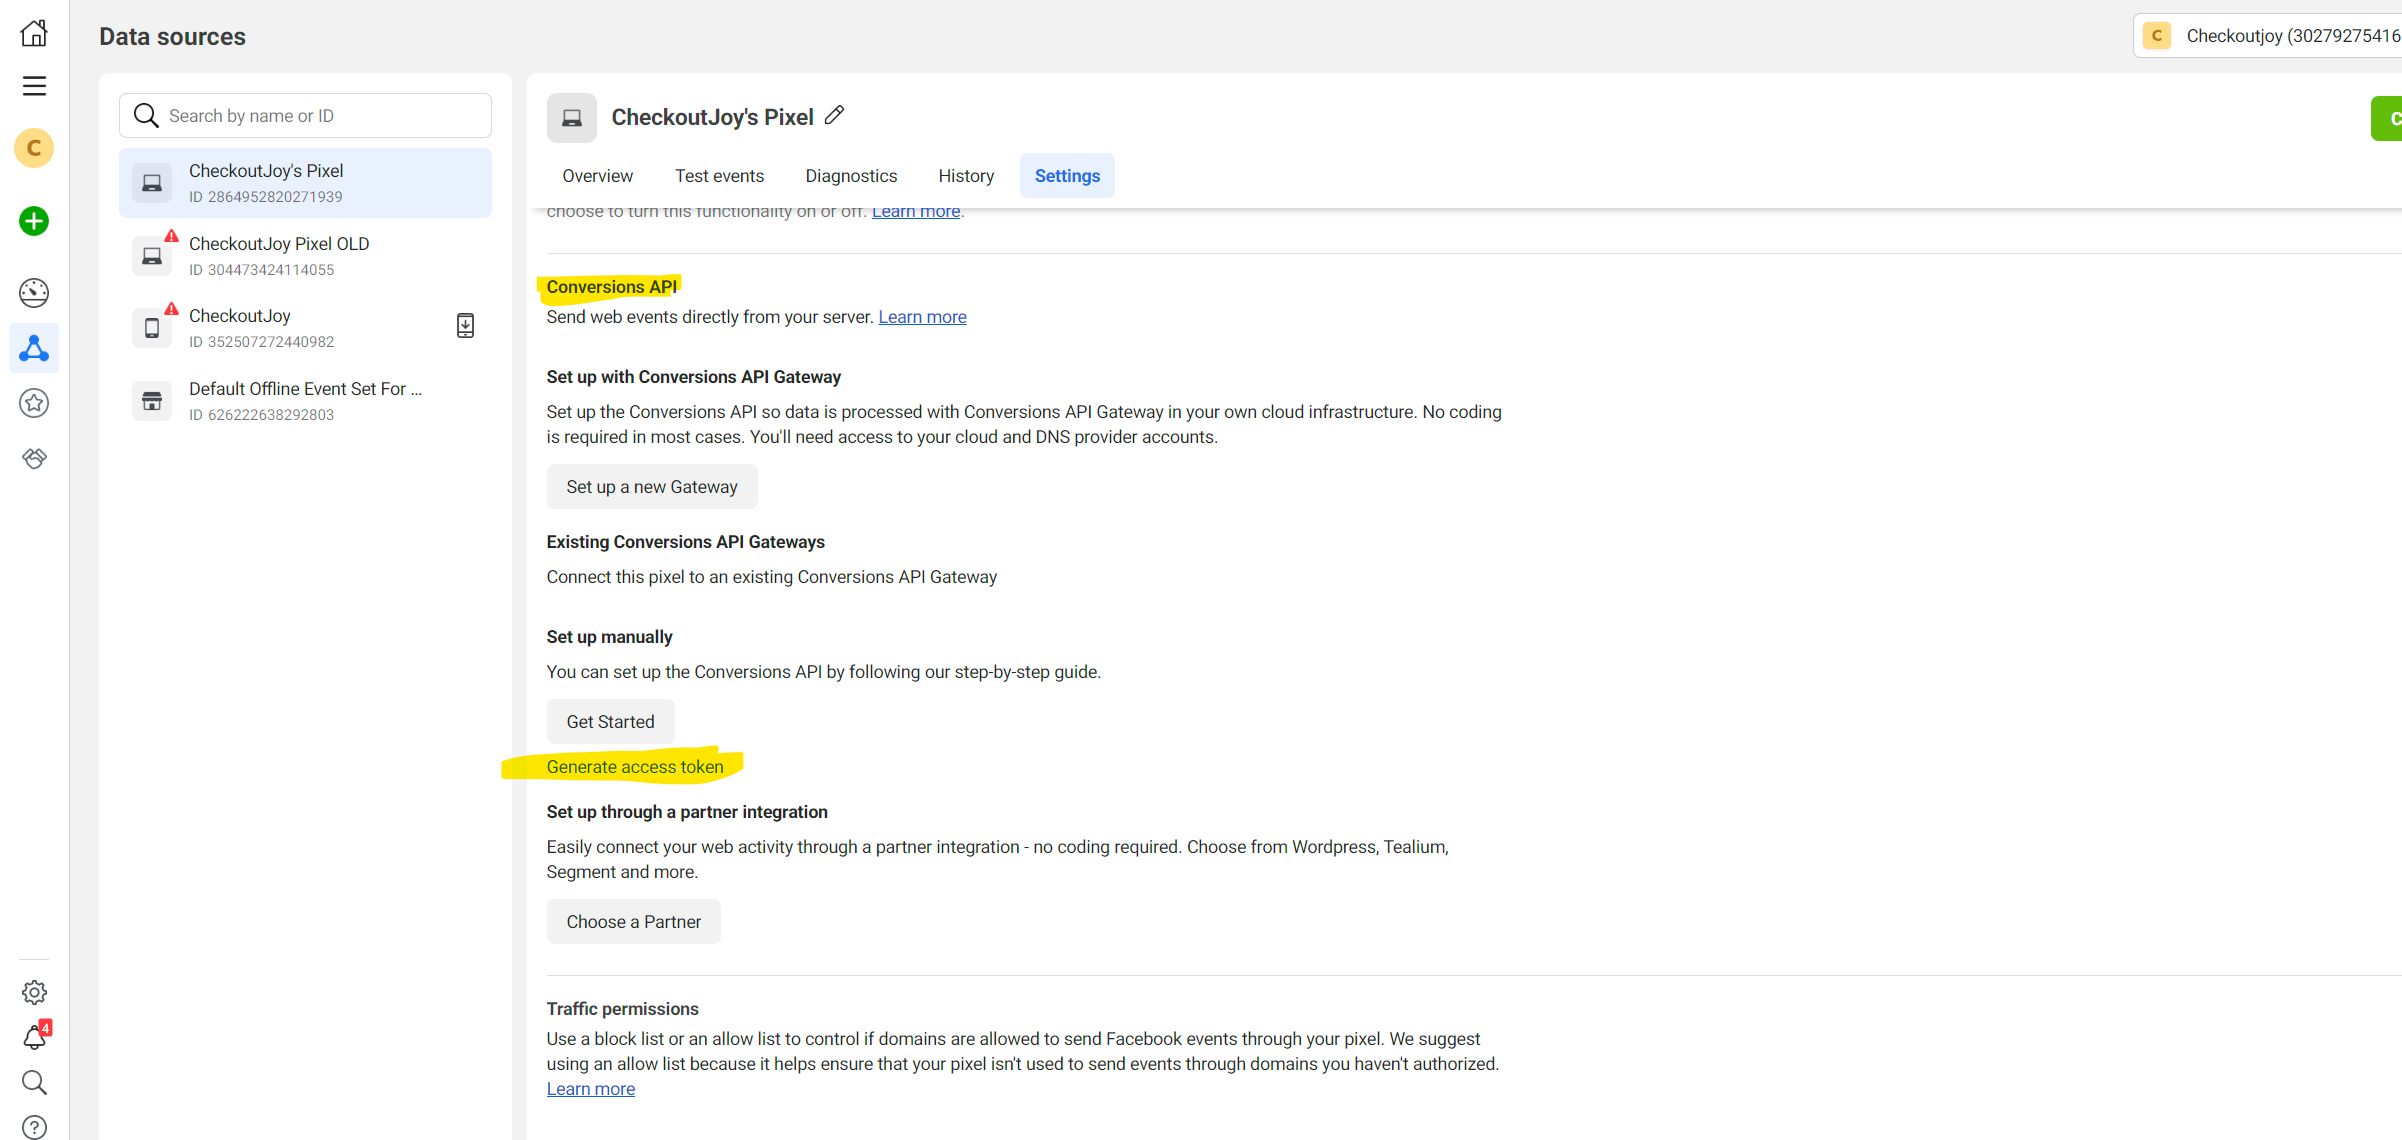
Access Token
Visit your Facebook Events Manager (opens in a new tab)
- Go to Data Sources and select the Pixel that you want to connect from the list.
- Go to the Settings tab
- Scroll down to the Conversion API > Existing Conversion API section
- Click on the Generate Access Token link and copy the value into the CheckoutJoy settings page.